You no longer have to wait for an unprofitable or irrelevant search term to trigger and eat up your budget before you can block it. With Ad Badger’s Proactive "Create Negatives" feature, you can manually create negative keywords and negative targets for terms you haven't even seen in your active campaigns yet.
This tool is designed to stop ad spend waste before it ever costs you a dime.
Where to Find the "Create Negatives" Button
The + Create Negatives button is built into three primary areas of the Ad Badger dashboard:
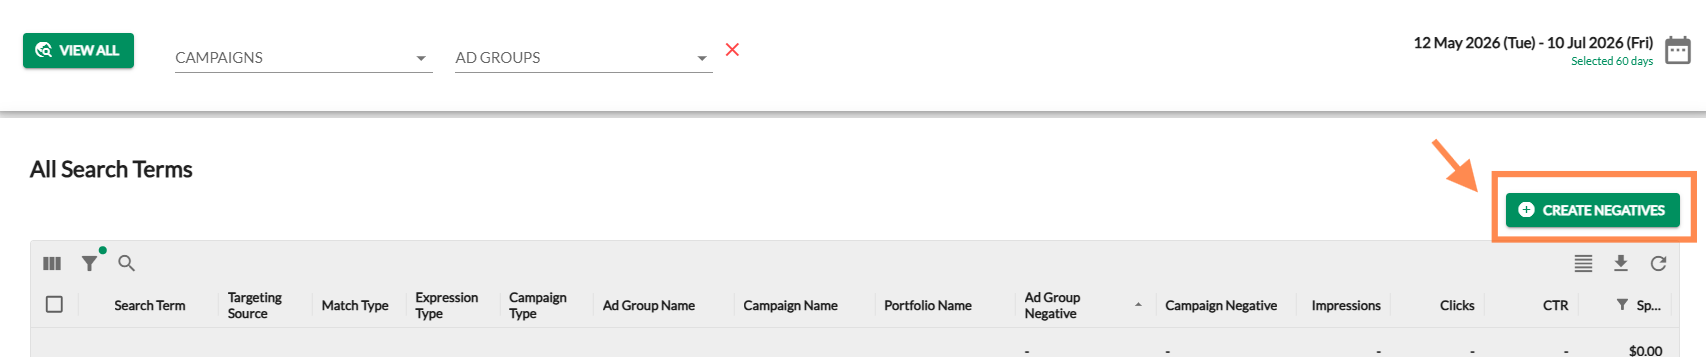
1. All Search Terms Table
Directly access the button at the top right of the main All Search Terms dashboard. This is ideal for quickly adding negative keywords on the fly as you review overall account performance.
2. N-Gram Explorer Details
You don't have to block phrases blindly.
-
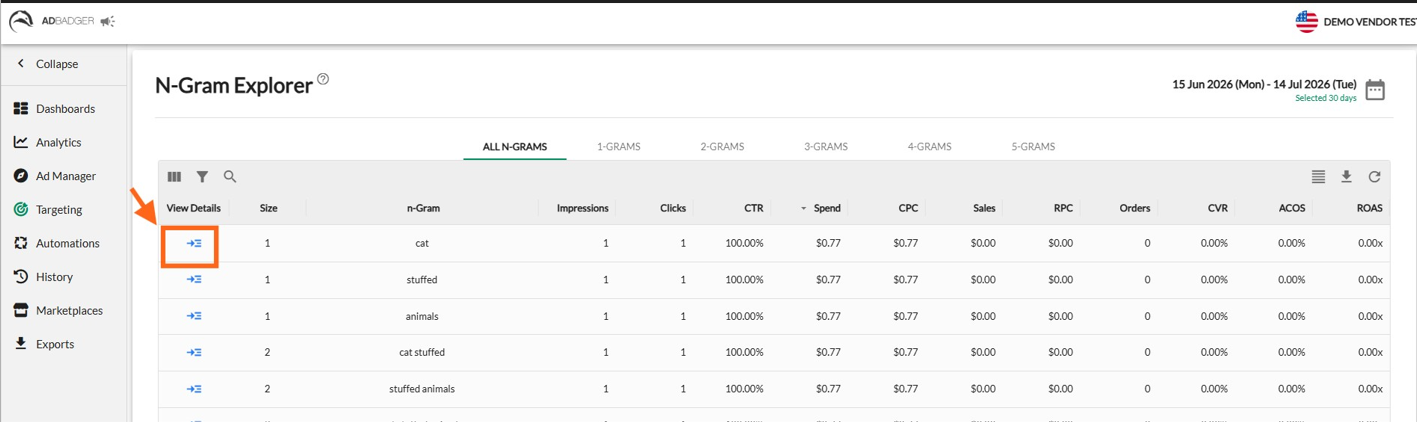
To find it, navigate to the N-Gram Explorer list.
-
Click the blue View Details action arrow next to a specific n-Gram.
-
Inside the N-Gram Explorer: Details sub-table, you will find the green + Create Negatives button in the top right corner.

3. Duplicate Hunter Details
If you spot duplicate terms that need immediate, precise containment:
-
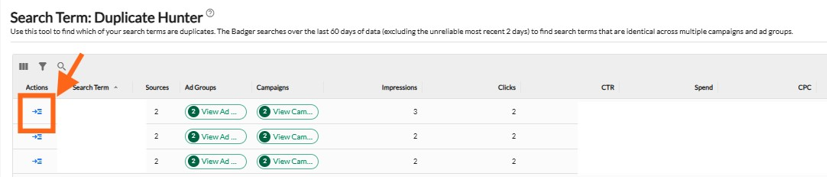
Navigate to the Search Term Duplicate Hunter dashboard.
-
Click the blue View Details action arrow next to any duplicate search term.
-
Inside the Search Term: Duplicate Details screen, click the green + Create Negatives button in the top right corner.

How to Configure Your Proactive Negatives
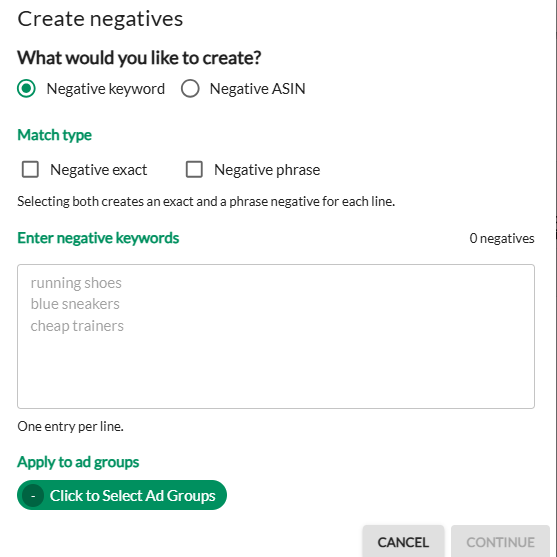
Clicking + Create Negatives opens a simple step-by-step configuration wizard:
Step 1: Choose Your Negative Type
At the top of the popup, select what type of target you are blocking:
-
Negative Keyword: Standard text-based negative matching.
-
Negative ASIN: Prevents your products from showing up on specific competitor product pages.
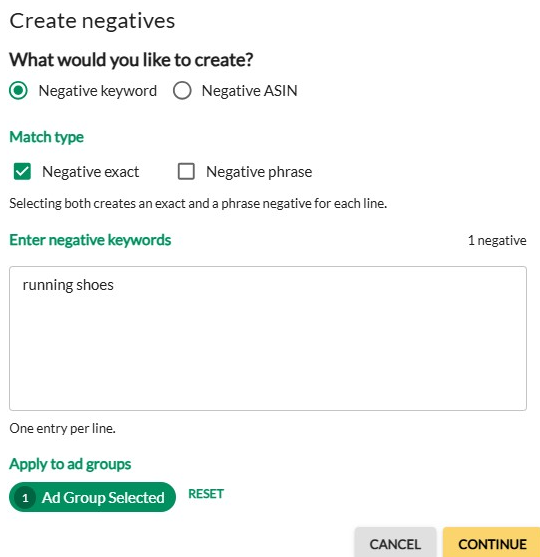
Step 2: Select Match Type & Enter Terms
-
Match Type: Select Negative Exact, Negative Phrase, or check both options.
- Note: Selecting both automatically generates both an Exact and Phrase negative entry for every line you write.
-
Enter Negative Keywords: Type or paste your terms into the text area. Be sure to put only one entry per line.
Step 3: Apply to Ad Groups
Click the green Click to Select Ad Groups button. A menu will open allowing you to choose exactly which ad groups or campaigns you want to apply these negatives to.
Once your ad groups are chosen, click Continue.
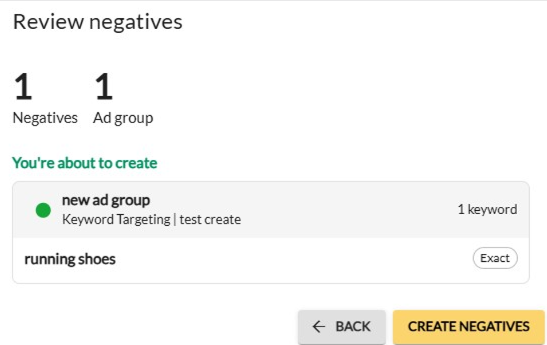
Step 4: Review and Create
The Review Negatives screen acts as your safety check. It shows a summary of:
-
The total number of pending negatives.
-
The number of ad groups they are being applied to.
-
A clear preview of the exact keywords and match types you are about to create.
If everything looks correct, click the yellow Create Negatives button.
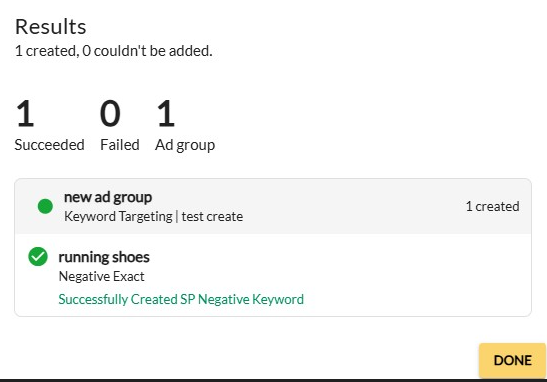
Step 5: View Results
The final Results screen will display a real-time status report of your changes. It shows exactly how many negative creations succeeded, if any failed, and lists the target ad groups. Click Done to close the wizard and return to your dashboard.
💬 Need Help? Reach out to our Support Team anytime through the Live Chat bubble in the lower-right corner of the tool.