When you are managing large campaigns, sorting through hundreds of rows of search terms or keywords can quickly become overwhelming. Instead of exporting raw CSV files to crunch the numbers manually, you can use Ad Badger’s Filter Engine to segment your data in seconds.
Whether you want to isolate bleeding search terms with zero conversions or find highly efficient hidden gems, custom filters let you surface actionable insights instantly.
Accessing the Filter Menu
You can filter data on almost any main table within Ad Badger (such as the Ad Manager, All Search Terms, or Duplicate Hunter tables).
-
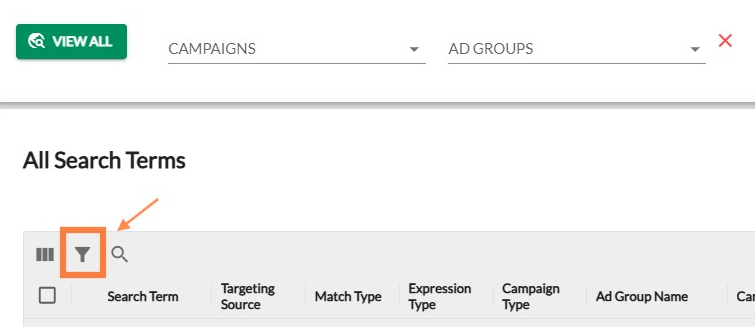
Locate the funnel icon (Filter Results) in the toolbar directly above your data table.
-
Click the icon to open the Filter Results configuration modal.
Creating a New Filter
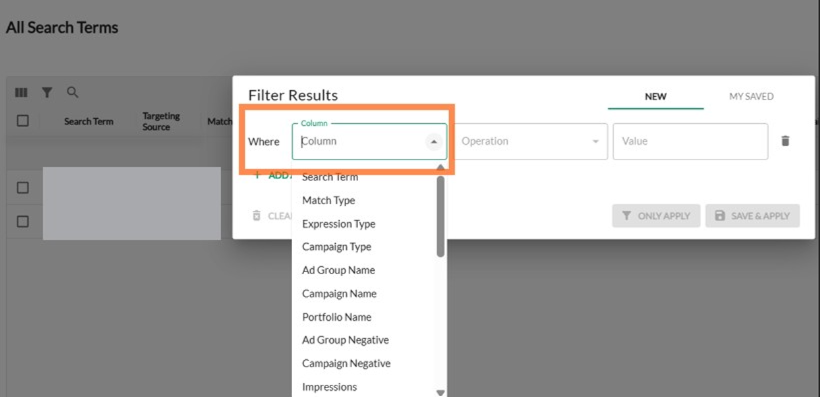
The filter modal is divided into two tabs: New and My Saved. To build a filter from scratch, ensure you are on the New tab:
-
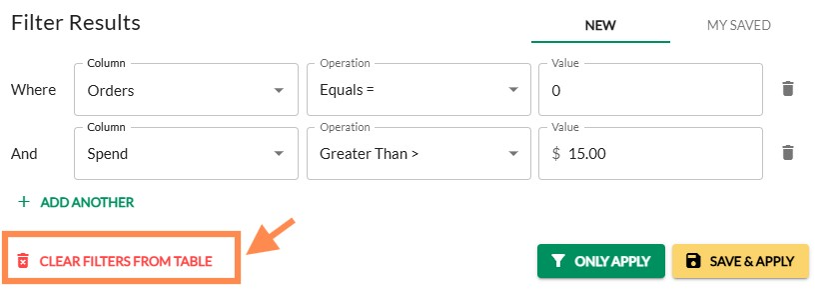
Select Column: Click the first dropdown to choose the metric or attribute you want to filter by (e.g., Search Term, Match Type, Orders, Spend, etc.).
-
Choose Operation: Select the comparison logic (e.g., Equals =, Greater Than >, Contains, etc.).
-
Enter Value: Input your target threshold (e.g.,
0for Orders, or15.00for Spend). -
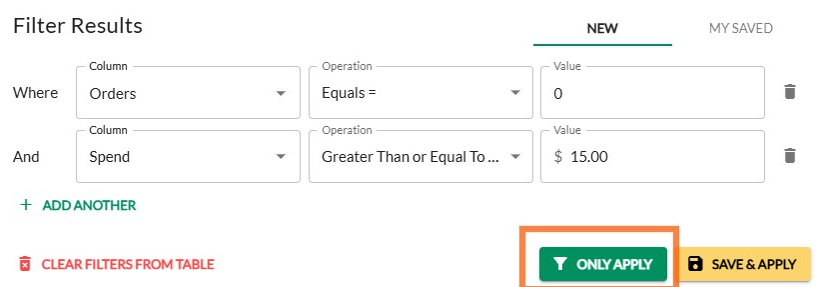
Add Multiple Conditions (Optional): Click + Add Another to combine criteria. This creates an "AND" sequence (for example:
Orders Equals 0ANDSpend Greater Than or Equal To $15.00).
Applying vs. Saving Your Filters
Once your filter logic is set, you have two options at the bottom right of the modal:
Option A: Only Apply (One-Time Use)
If you just want to run a quick, temporary check on your data, click the green Only Apply button. The modal will close, and your table will instantly update.
- Note: This filter will not be saved for future sessions.
Option B: Save & Apply (Repeatable Custom Filters)
If this is a search pattern you plan to run regularly (e.g., a weekly check for zero-order bleeders), click the yellow Save & Apply button.
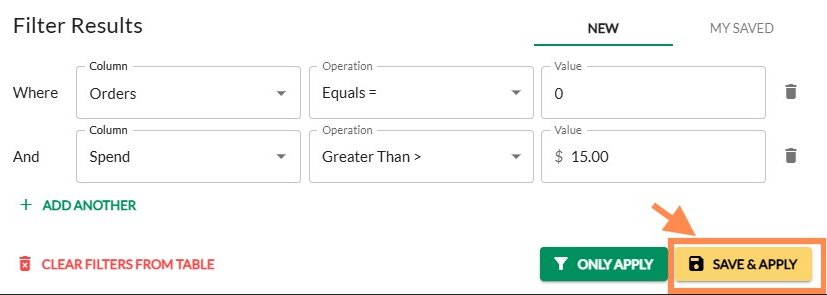
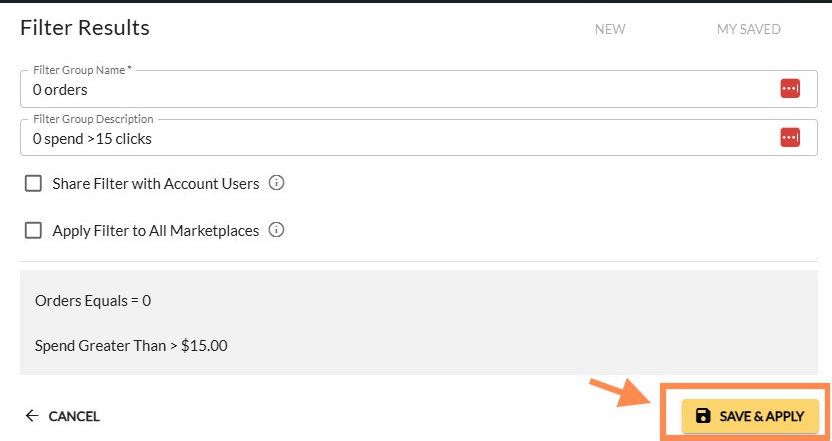
This opens the Save Filter wizard, where you can customize how the filter behaves:
-
Filter Group Name: Give your custom filter a clear, descriptive name (e.g.,
0 orders). -
Filter Group Description: Add details about the logic so you remember exactly what it does (e.g.,
0 spend > 15 clicks). -
Share Filter with Account Users: Check this box to make this custom filter available to everyone else who has access to your Ad Badger account.
-
Apply Filter to All Marketplaces: Check this box if you want this filter template to be accessible across your other international marketplace dashboards.
-
Save: Click the yellow Save & Apply button at the bottom right to finalize and run it.
Managing Your Saved Filters
To use a filter you’ve previously configured:
-
Open the filter modal by clicking the funnel icon above your table.
-
Switch to the My Saved tab at the top right of the modal.
-
Select your named filter from the list to instantly apply it to your current view.

Clearing Active Filters
If you want to remove your active filters and return to the complete, unfiltered view of your data:
-
Click the funnel icon again to open the filter modal.
-
Click the red Clear Filters From Table button in the bottom left corner of the popup.
💬 Need Help? Reach out to our Support Team anytime through the Live Chat bubble in the lower-right corner of the tool.